Wrapping the House

They have finished putting up the cladding and have cut open some of the windows.

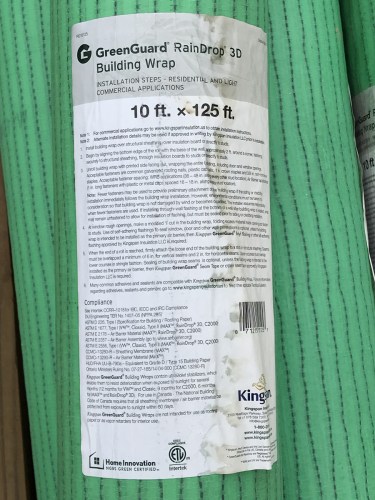
They delivered rolls of green wrap with the rest of the materials and I wanted to see how they put it up.

When we got there, they had put the wrap on the first wall.


They stapled the material, then secured it.

So, this is how they put it up. One guy rolled it out, while the other guy went behind him with a 2×4 to pull it into place and hold it up.

At the corner, with one hand he held the material up with the 2×4, while he pulled it down to make sure it was in exactly the right place.

Then they stapled it to keep it in place.

He went up, made sure it was tight into the corner and fastened the wrap.

This guy was nailing the top, while the other guys fastened the bottom.

My Dad would really be yelling if he saw this.


The bottom has this tape.
I wondered why they used this green wrap instead of Tyvek. Here is what I found:
Kingspan GreenGuard RainDrop 3D Building Wrap
Drains water better than any other wrap.
RainDrop 3D drains 50% more water than Tyvek® DrainWrap™Saves energy and money by reducing air leakage.
Air leakage is reduced by 20%, with an estimated energy savings of about 10% per year.Multi-functional wrap is three products in one.
It meets all the building code requirements of an air barrier, a water-resistive barrier, and a drainage wrap. By providing everything in a single package, RainDrop 3D eliminates the need to install three separate products on your home, thereby reducing material and labor costs.For use as an Air Barrier, Water-Resistive Barrier and Drainage Medium in Construction Environments where optimum Barrier Performance Plus Drainage Behind Wall Cladding is Required
Kingspan GreenGuard RainDrop 3D Building Wrap’s innovative drainage channels keep water out of the wall system. The channels are designed not to crimp, collapse, or flatten, ensuring water will drain no matter how tightly cladding is nailed to the wall. The material has demonstrated water holdout capabilities in industry-recognized water resistance tests. This non-perforated wrap also breathes to allow moisture vapor to escape.
With its high tear resistance and translucent design, installation is quick and easy with no job site waste. And it stays UV-stable up to 9 months.
Are you impressed yet?
Next: The Trusses are Delivered >
Discover more from Project Small House
Subscribe to get the latest posts sent to your email.
